Petticrows – Setting Up Your Dragon (October 2026)
↓ Readable PDF↓ Original pages (scan)
Petticrows’ twelve-step guide to giving a Petticrows Dragon a standard base set-up, updated in October 2026. It explains how to set jumpers (average 8 on the Loos gauge), mark the forestay 81 cm up the mast and set rake at 122 cm (123 cm light, 121 cm heavy), and measure from the station 4 line to the upper shroud (82 cm), lower shroud (85 cm), forestay plate (104 cm) and mast plate (82 cm), with a J measurement of no more than 186 cm. It then covers mast step position and 0–10 mm of pre-bend, setting the ram bottle screw, and marking maximum runner tension at 32 on the forestay. Summary and rig-tension tables give light, medium and strong wind shroud tensions and ram positions for the Standard mMast, iMast and eMast.
Rig set up guide
When setting up a Petticrows Dragon there are some basic steps to follow. This way you can be sure the boat is set up in a “standard” way. If you use these settings as a base reference, you can then experiment to find out exactly what suits your sailing.
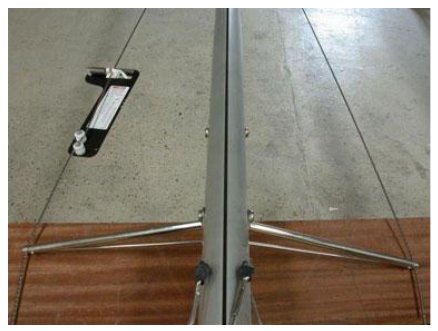
1. Set the jumper tension
If you have fixed jumpers then set the tension prior to stepping the mast. An average setting would be 8 on a Loos Tension gauge. Check the mast is straight sideways.
On adjustable jumper systems mark the overall tension control rope with 6, 8 and 10 (this can only be measured when the mast is up and from a ladder).
2. Mark the forestay
Put the mast up in the boat, so that it is standing vertically.
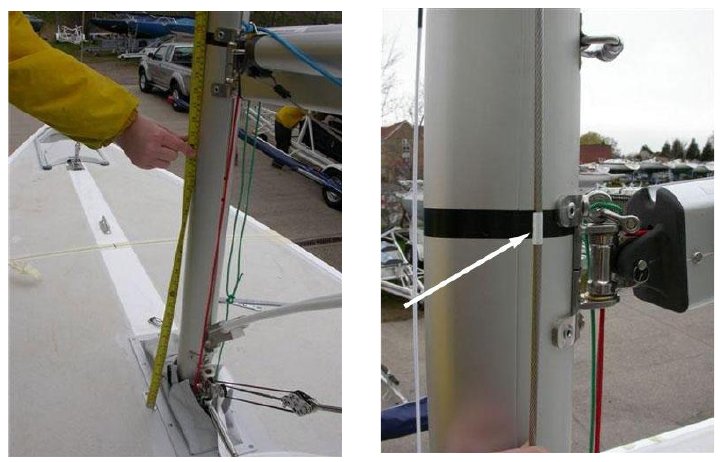
Measure from the deck: up the mast 81 cm and make a mark (class rule max 81 cm, min 79 cm). This will probably be at the top of your black band.
Pull the forestay down the mast and mark the forestay at the mark which is 81 cm up the mast.
The mark on the forestay is your reference.
The mast should be all the way forward.
3. Establish the mast rake
Connect the forestay.
Do not connect the mast ram bottle screw or shrouds.
Get some tension on the forestay with a little runner or backstay tension.
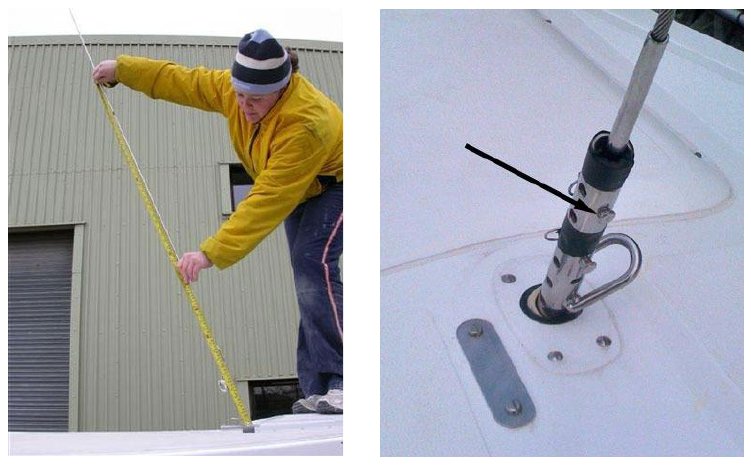
Measure from the mark on the forestay to the deck.
This measurement is your mast rake.
The average mast rake measurement should be 122 cm.
In heavy winds the mast can be raked aft so that the mast rake measurement is 121 cm.
In light winds the mast can be raked forwards so that the mast rake measurement is 123 cm.
If the rake is incorrect, it can be altered by changing attachment point of the forestay.
It is a good idea to tape above and below the most commonly used holes.
4. Find station 4 line
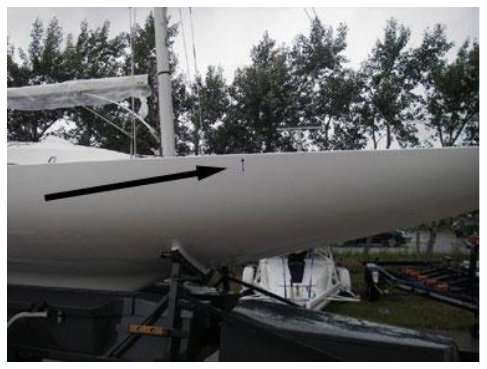
On the topsides of the boat just below the edge of the deck there are small spots which show the position of measurement stations. Station 4 is about 120 cm in front of the mast.
With a straight edge and some tape join the station 4 marks across the deck of the boat.
This line across the deck will be your reference for your mast, forestay and shroud position.
5. Find shroud positions
Measure from station 4 line perpendicularly to the front face of the upper shroud. This measurement should be 82 cm.
Measure from the station 4 line to the front face of the lower shroud. This measurement should be 85 cm.
It is normal to have the shrouds inline with the front of the mast when sailing upwind. Moving them aft from this position has the effect of making the mast bend less.
Forward of inline and the mast will bend more.
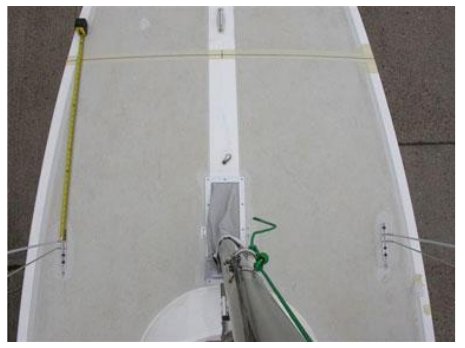
6. Find forestay measurement plate position
Measure from station 4 line to the front of the forestay plate. This measurement should be 104 cm. The plate can be 75 mm long. The forestay must be within the front and back of this plate.
We always put the forestay at the front of this plate.
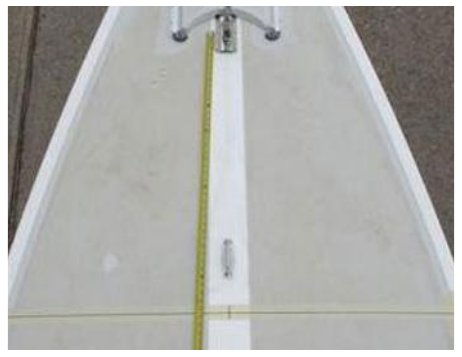
7. Find mast measurement plate position
Measure from station 4 line to the aft of the mast measurement plate. This measurement should be 82 cm.
This plate is 50 mm long.
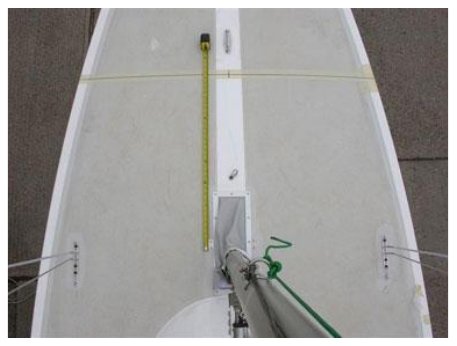
8. Check the “J” measurement
The J measurement is the distance between the front of the forestay measurement plate and aft of the mast measurement plate.
This should be a maximum of 186 cm as per class rules.
9. Mast step position and pre bend
Without connecting the mast ram bottle screw or shrouds and with the mast rake at 122 cm, push the mast aft so that the forestay has some tension. You can use a little runner tension to achieve this. Do not bend the mast.
Normal position of the mast is that the front face is level or aft of the aft end of the mast measurement plate.
If the front of the mast is level, there will be no prebend when you connect and adjust the mast ram bottle screw. If you are (as an example) 5 mm behind, you will have 5 mm of prebend when you connect and adjust the bottle screw.
It is normal to have between 0 and 10 mm prebend.
If the mast is more than 10 mm behind the aft end of the mast measurement plate, this indicates the mast step pin needs to be moved FORWARD.
If the mast is in front of the mast measurement plate, this indicates the mast step pin must be moved AFT.
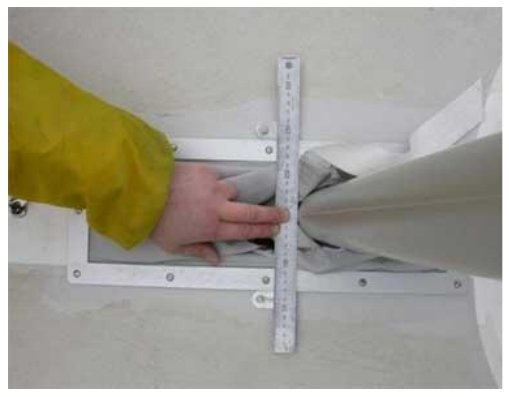
10. Connect Shrouds and adjust Mast Ram Bottle Screw
Connect the shrouds in the chosen shroud position and wind the upper shroud nut to achieve a tension of 15 on the Loos gauge. Make sure the shroud calibration marks are equal port and starboard.
Connect the lowers in the next hole aft and wind the shroud nuts to achieve a tension of 10. Again, make sure the calibration marks are equal.
Connect the Mast Ram bottle screw to the mast. Pull tension on the runners.
Adjust the bottle screw open or closed so when the lever is pulled maximum aft the front of the mast is level with the aft of the Mast Measurement plate. Using the locking nuts fix bottle screw in this position.
Sight up the mast and if the mast step position is correct the mast will be straight fore/aft or have a forward bend of up to 10 mm (the pre-bend).
To check the forward movement of the mast ram: release the runners and backstay. Uncleat the mast rope controlling the lever, so the bottle screw pushes the mast forward. In this position the front of the mast must not be further forward than the front of the Mast Measurement Plate.
If it does, then you must restrict it from exceeding the class rule maximum movement of 50 mm.
11. Measure the shroud tension
Using a Loos Model PT-2M tension meter set the shroud tensions depending on the weather conditions.
Measure directly onto the wire.
The figures given are for boats newer than 2008, in older models of boat the hull is not so stiff so up to 30% more tension is required.
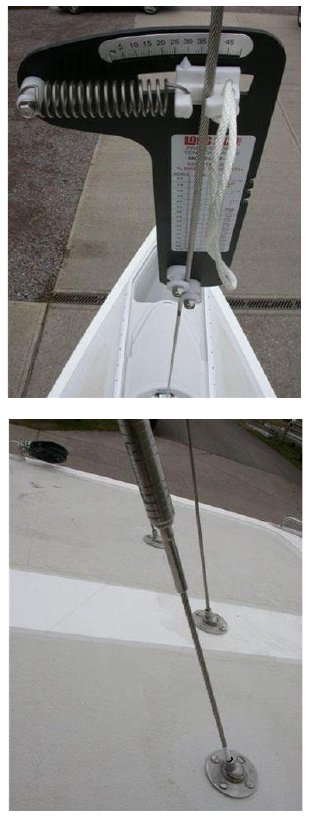
12. Mark your Maximum Runner Tension
Attach a Loos Gauge to the forestay.
Pull on the runner until the tension is 32.
Put a mark on the runner wire where it enters the deck. This can be used as a guide to runner tension while sailing.
32 is the absolute maximum in strong winds.
Rig settings guide – Summary
| Jumper average tension | 8 |
| Average mast rake measurement | 122 cm |
| Mast rake light wind | 123 cm |
| Mast rake strong wind | 121 cm |
| Station 4 line to front upper shroud | 82 cm |
| Station 4 measurement to front of forestay measurement plate | 104 cm |
| Station 4 line to aft of mast measurement plate | 82 cm |
| Maximum runner tension (measured on forestay) | 32 |
Please note:
The shroud positions and forestay positions detailed are the current measurements put on new boats for best balance.
On older Petticrows boats the mast measurement plate and forestay measurement plate would have been fitted in the optimum position for that age of boat.
Check these measurement plate positions and adjust the shroud and forestay positions using the same principles as detailed above.
Rig tension
Rig tension guide Standard mMast
| Light winds | Medium winds | Strong winds |
|---|---|---|
| Lower shroud 0 |
Lower shroud 5-10 |
Lower shroud 15 |
| Upper shroud 12 |
Upper shroud 15 |
Upper shroud 20-25 |
| Upwind Mast Ram Forward from max aft by 1-1.5 cm |
Upwind Mast Ram Max aft |
Upwind Mast Ram Forward from max aft by 1-1.5 cm |
Rig tension guide iMast
| Light winds | Medium winds | Strong winds |
|---|---|---|
| Lower shroud 0 |
Lower shroud 5-8 |
Lower shroud 10-12 |
| Upper shroud 10 |
Upper shroud 14-15 |
Upper shroud 16-20 |
| Upwind Mast Ram Forward from max aft by 1-1.5 cm |
Upwind Mast Ram Max aft |
Upwind Mast Ram Forward from max aft by 1-1.5 cm |
Rig tension guide eMast
| Light winds | Medium winds | Strong winds |
|---|---|---|
| Lower shroud 0 |
Lower shroud 5-10 |
Lower shroud 15 |
| Upper shroud 14 |
Upper shroud 18 |
Upper shroud 20-25 |
| Upwind Mast Ram Forward from max aft by 1-1.5 cm |
Upwind Mast Ram Max aft |
Upwind Mast Ram Forward from max aft by 1-1.5 cm |
Caution: The lower shroud tensions given are a guide only and for any chosen upper shroud tension. The lower shroud tension can only be correctly achieved by sailing upwind, sighting up the mast and adjusting the lower shroud tension until the mast is straight sideways.
Originally published as “Trim Tips – Setting Up Your Dragon (October 2026 update)” in the Petticrows – Setting Up Your Dragon (October 2026). © Petticrows.
← Back to the Technical Library